
Shopsite makes it easy to change multiple fields of multiple prooducts at one time, without manually editing product by product. This can be done using an excel spreadsheet. Below is how to properly format your excel spreadsheet for a product upload into shopsite.
Follow these directions:
- In the excel spreadsheet make sure these 2 things are correct.
- In the price column there has to be 2 numeric values after the decimal. Make sure this column is set to “number” formatting or it will take out the 0 such as 2.30 will become 2.3 and this will cause errors.
- After the last column in the spreadsheet type “junk” this must fill the entire column from 1st product listed to the last.
- Next we will make a database backup before upload. In ShopSite select the Utilities menu and select Database from the dropdown.
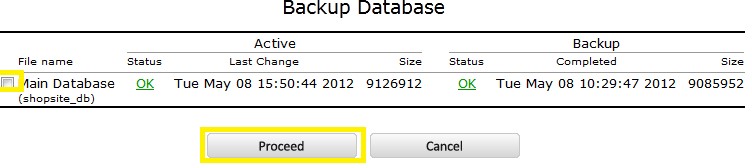
5. On the Database screen select Backup.

6. From the Backup screen you are going to make 2 selections. 1st click the checkbox next to Main Database, the click proceed.
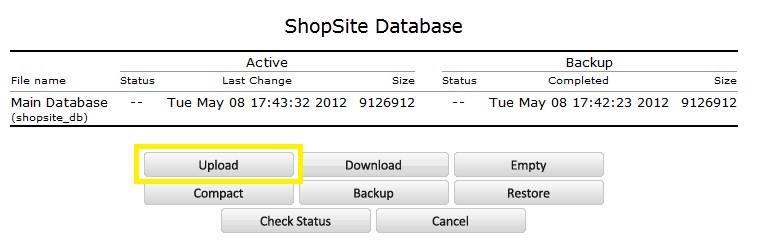
7. If successful then once again select Utilities>Database.
8. This time from the Database screen select Upload.
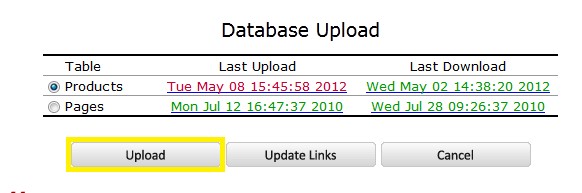
9. From the upload screen the products radio button should be default selected, if not select it and click Upload.
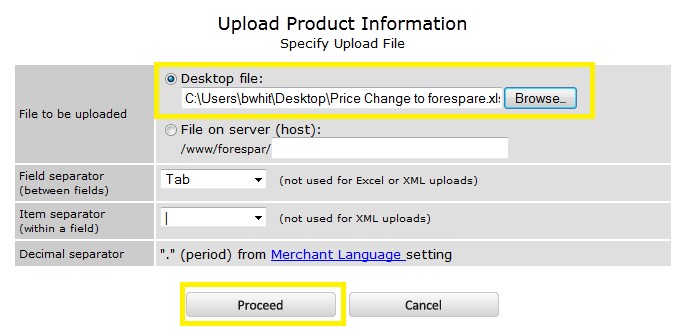
 10. From the Upload Product Information screen select browse and find the file you are going to upload. Then select Proceed.
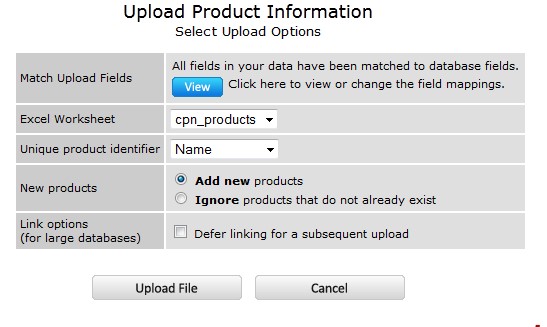
11. On the Upload Product information screen you need to verify some information. First you should make sure it is the correct file and you set your unique product identifier, usually the sku. If you have fields that SS does not recognize or custom product fields that need mapped to a SS field you’ll click on the “View” button in “Match Upload Fields”.
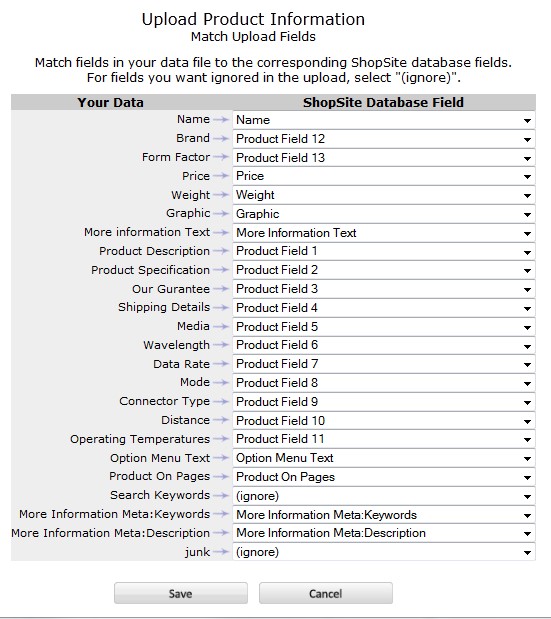
12. Clicking the view button brings you to the “Match Upload Fields” screen. On the left are the excel field names and on the right are the SS fields to map to. The junk field is always set to ignore. Click “Save” when finished.
13. You will be returned to the previous screen. Click “Upload File”.
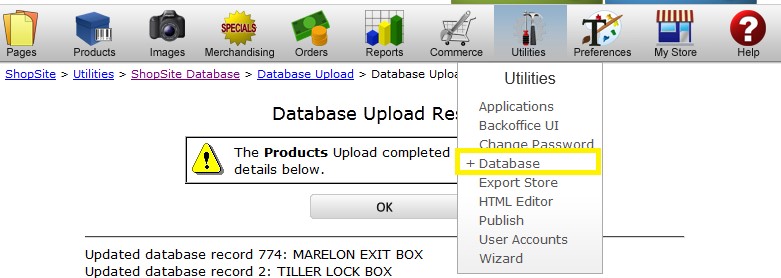
 14. The next screen will tell you whether you were successful or not, if not it will give error details and take appropriate action.
MAY